Published
- 7 min read
Create my first Slack chat bot

My first Slack bot
Overview
This repo contains a set of short tutorials with code snippets describing the process of creating a small and simple bot for Slack.
Slack is a great tool that helps us, the developers, to communicate and work things easier and more convenient. Compared to other tools we used to use such as Skype, Slack is a way better application in terms of its stability, compatibility on mobile and desktop. More importantly, Slack support tons of applications such as Trello, GitHub,…
Slack Bot is another application that we can have on Slack which helps us do things faster and more efficient. The Bot that we are going to create will mostly serve our entertaining purpose, however, you can always improve it to make it meet your needs.
Install Node.js
You can find the latest version Node.js for your Operating System here
After installing Node.js, you are also recommended to install Node Version Manager (nvm) which basically helps you to have multiple versions of Node.js in your system. However, this step is optional.
To check the your current version of Node, enter the following in your Terminal (UNIX,LINUX) or Command Line (Window):
$ node -vThis should return you a version later than 5.6.0. Also, to check the current version of npm, enter the following:
$ npm -vAfter this point, your have successfully installed Node.js. Let’s get into the next step.
BotKit
You need to have a folder for your project. Let’s make a folder called SlackBot and change directory into the folder
       $ mkdir SlackBot
$ cd SlackBot
To create a Node.js project, simply type the following:
$ npm initIf you follow the above steps, in the SlackBot folder you will see a node_modules folder which stores all the built-in modules that Node already prepared for you. Don’t worry about this folder yet, you won’t have to touch this folder. You should also a file named package.json. This file will store any information of your application. You can leave it as default if you wish.
Now, let’s install a library called BotKit which helps to quickly build a bot for Slack. You can find the documentary for the BotKit API here. To install BotKit, type the following:
$ npm install --save botkitOnce your botkit module is ready, you can now begin the fun part
Add Functions
Let’s create an index.js inside the SlackBot folder. This is the file where we will implement our bot’s functions and behaviours. To initialize our bot, put the folling code inside index.js:
       var Botkit = require('botkit')

var controller = Botkit.slackbot({
	debug: true
})

controller
	.spawn({
		token: 'your api token'
	})
	.startRTM()
Notice that there is an API token missing in the snippet. Our bot will use this token to interact with users in your Slack workspace using something called Real Time Messaging API. In order to get the API token, following the instruction here and then you will see something like this:

Once you get there, let’s implement our bot’s first function. So we want our bot to say something to us when we say Hello.
       controller.hears(
	['hello', 'hi'],
	['direct_message', 'direct_mention', 'mention'],
	function (bot, message) {
		controller.storage.users.get(message.user, function (err, user) {
			if (user && user.name) {
				bot.reply(message, 'Hello, ' + user.name + '!')
			} else {
				bot.reply(message, 'Hi!')
			}
		})
	}
)
As you can see, the controller.hears take in 3 parameters. The first one is an array of what the user input it, in this case, hello or hi. The second parameter is how the bot will get the message, it can be through direct message, direct mention or mention. And the third parameter is where our bot will reply with a message Hi if it doesn’t know the user name or Hello, … if the user name is set. To set the username, let’s try the following code:
       controller.hears(
	['You can call me (.*)'],
	['direct_message', 'direct_mention', 'mention'],
	function (bot, message) {
		var name = message.match[1]
		controller.storage.users.get(message.user, function (err, user) {
			if (!user) {
				user = {
					id: message.user
				}
			}
			user.name = name
			controller.storage.users.save(user, function (err, id) {
				bot.reply(message, 'Sure, Master ' + user.name)
			})
		})
	}
)
If you type something like: You can call me Bob, then the bot will know your name as Bob and it will later on rememeber you as Bob. The next part I will demonstrate how to implement a YouTube Search for our bot. So in order to do so, you have to register a Google developer account where you will get another API_key. Please follow the instruction in this documentary to get your Google API key. Once you get that, you can access the YouTube Search API. More information about the YouTube API can be found here
So when it comes to API, one thing we usually use is Ajax. It is pretty simple to use Ajax with jQuery. However in this app, using jQuery is not that easy and convenient. Fortunately, there is another node module out there to help us to cope with this. So let’s install two libraries called require and require-promise. Let’s type the following in your Terminal / Command Line:
       $ npm install require
$ npm install require-promise
and add the following to the beginning of your index.js.
var request = require('request-promise')Here is the code to work with the YouTube API:
       controller.hears(
	['play (.*)', 'Play (.*)', '!play (.*)'],
	['direct_message', 'direct_mention', 'mention'],
	function (bot, message) {
		var searchTerm = message.match[1]
		var url = `https://www.googleapis.com/youtube/v3/search?part=snippet&maxResults=1&q=${searchTerm}&key=${youtubeKey}`
		let videoURL
		request(url).then(function (data) {
			data = JSON.parse(data).items[0].id.videoId
			videoURL = `https://www.youtube.com/watch?v=${data}`
			controller.storage.users.get(message.user, function (err, user) {
				bot.reply(message, 'This is what I found: ' + videoURL)
			})
		})
	}
)
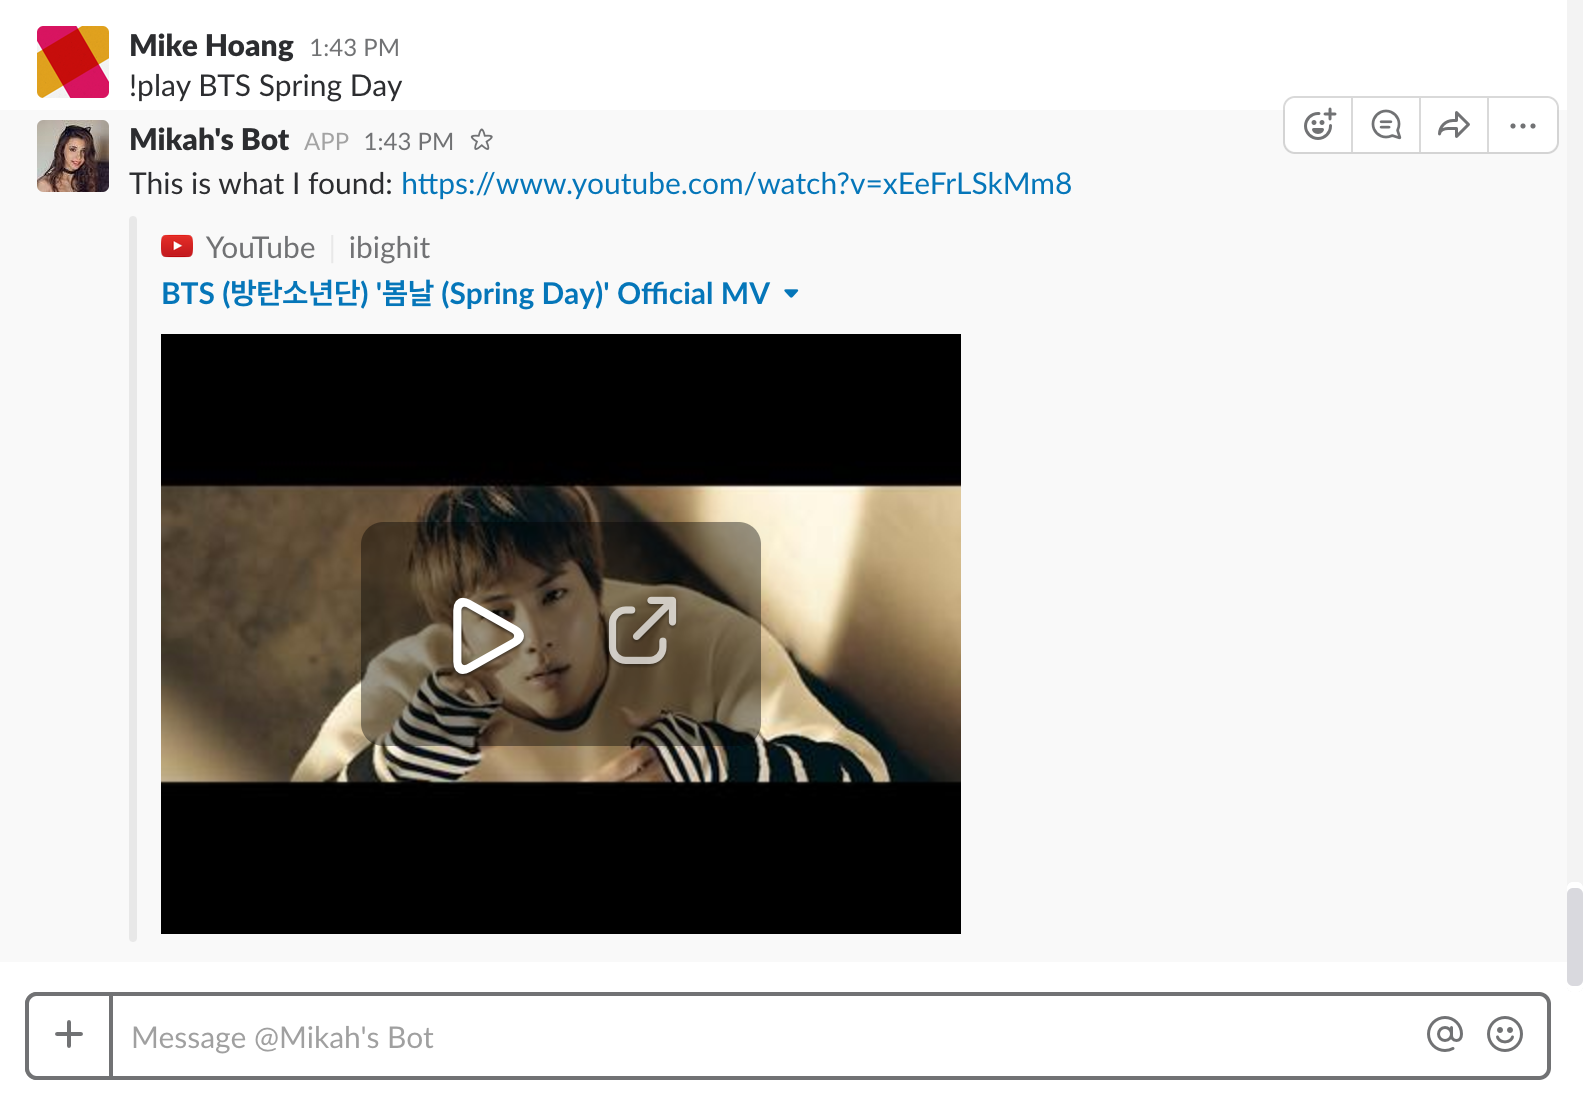
So you need to remind the youtubeKey with your API key you got from the Google Developer account credentials. And it’s just that easy, you will have a bot that can search a song based on what you enter, something that looks like this:

Add Cleverbot.io
So far, our bot can only follow what we instruct them in a hard-coded way. To make it smarter and more like ‘human’, let’s use a library called Cleverbot.io. So let’s replace all the controller.hears function we wrote with this:
       controller.hears(
	'',
	'direct_message,direct_mention,mention',
	function (bot, message) {}
)
So the final code at this point should be like:
       var Botkit = require('botkit')
var request = require('request-promise')
var controller = Botkit.slackbot({ debug: true })
controller.spawn({ token: slackToken }).startRTM()
controller.hears(
	'',
	'direct_message,direct_mention,mention',
	function (bot, message) {}
)
Now, let’s install the Cleverbot library. Type the following in the Terminal:
$ npm install --save cleverbot.ioThen go to this website and sign up for an account to get an API_KEY and API_USER. After you are done, let’s head back to index.js and add these codes to the very beginning of your file. Don’t forget to replace the API_KEY and API_USER with your own API keys
       var cleverbot = require('cleverbot.io'),
	cleverbot = new cleverbot('API_USER', 'API_KEY')
cleverbot.setNick('Bob')
cleverbot.create(function (err, session) {
	if (err) {
		console.log('cleverbot create fail.')
	} else {
		console.log('cleverbot create success.')
	}
})
Final step, add this code snippet to the hear function:
       controller.hears(
	'',
	'direct_message,direct_mention,mention',
	function (bot, message) {
		var msg = message.text
		cleverbot.ask(msg, function (err, response) {
			if (!err) {
				bot.reply(message, response)
			} else {
				console.log('cleverbot err: ' + err)
			}
		})
	}
)
The final code should be like:
       var cleverbot = require('cleverbot.io'),
	cleverbot = new cleverbot('API_USER', 'API_KEY')
cleverbot.setNick('Bob')
cleverbot.create(function (err, session) {
	if (err) {
		console.log('cleverbot create fail.')
	} else {
		console.log('cleverbot create success.')
	}
})
var Botkit = require('botkit')
var request = require('request-promise')
var controller = Botkit.slackbot({ debug: true })
controller.spawn({ token: slackToken }).startRTM()
controller.hears(
	'',
	'direct_message,direct_mention,mention',
	function (bot, message) {
		var msg = message.text
		cleverbot.ask(msg, function (err, response) {
			if (!err) {
				bot.reply(message, response)
			} else {
				console.log('cleverbot err: ' + err)
			}
		})
	}
)
And don’t forget to enter this magic line to start your very first Slack bot:
$ node index.js